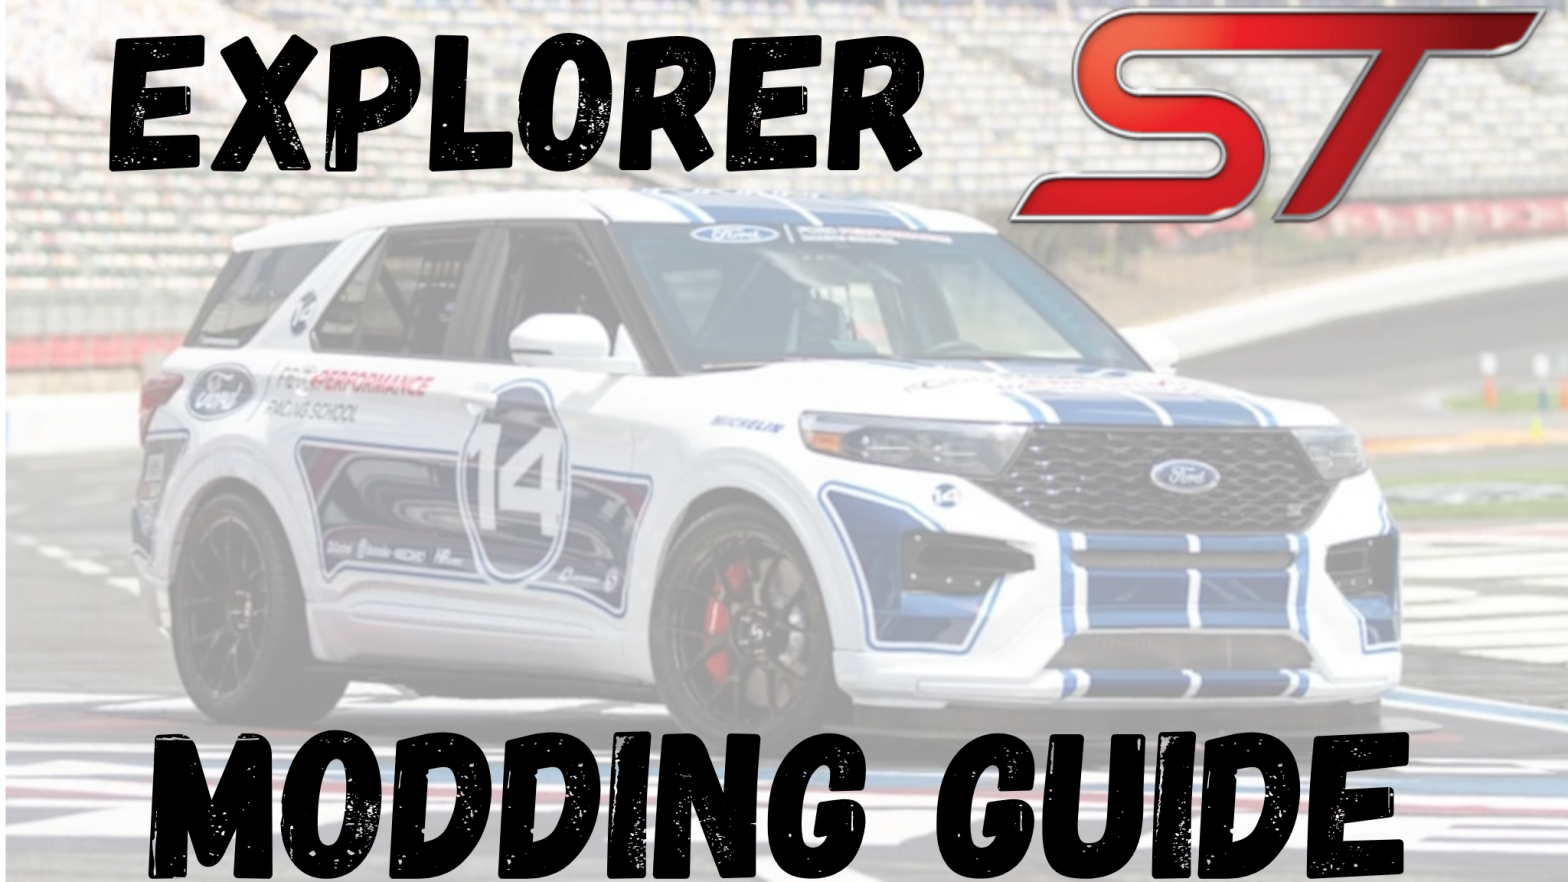
Hello everyone, I have pulled quite a bit of information regarding aftermarket parts for the Explorer ST into the ultimate modding guide. This is a guide on all aftermarket parts available for the Explorer ST. As a disclaimer, I am not affiliated with any of the companies mentioned, and regrettably, nor do I have any of the aftermarket products installed on my vehicle. This guide is updated regularly with new parts and updated descriptions.

I present to you the Explorer ST Modding 101 Guide! Enjoy!
Forward

The number one question I’ve heard people ask is “will this mod void warranty?” By law Ford can’t void warranty without proving the aftermarket part caused the problem. But we all know this doesn’t mean they will follow it. With so many little parts and major electronics, it is easy for Ford to find a way to blame the aftermarket part caused the problem. The biggest variable however, is the dealer. The dealer can choose if they want to make a big deal of the aftermarket part, or let it slide. Ford still is the decision maker, but a dealer could shed a blind eye and not mention the vehicle is modded. So it all depends on how the dealer feels about the mods and if you have a good relationship with them. I’ve heard rumors about Ford and other aftermarket warranty companies sending corporate reps to inspect vehicles on big ticket warranty cases like engines and such, which might make that point null and void. Might just be rumors, but just something to note. In the end, this is a pay to play game, if you’re worried about warranty, don’t modify. If you are willing to take the risk, you won’t ever look back. Here’s an article we did on the subject:
Another point to mention is “is this part going to cause problems.” This is very subjective to part that is being considered, but for the most part, I have never seen a quality part cause problems that would have otherwise not have occurred. These vehicles are pretty stout, and most of the parts on these cars hold up to a lot of extra abuse.
Brakes

If you run the Sport-Technology (ST) Explorer hard, and are tired of brake fade, you might want to look into a brake upgrade. Brake upgrades range from just a rotor and pad change, all the way to 8-piston caliper, 405-MM rotor brake kits.
Stock Brake Upgrade
Stainless Steel Brake Lines

A good brake system upgrade, whether you have a BBK (usually they should come with SS lines) or stock brakes are a set of Stainless-Steel Brake Lines. Stock rubber lines will swell and stretch when pushed hard, causing a mushy brake feel, diminishing brake feel, and poor braking. Stainless steel brake lines will not do that, and improve brake feel, and slow down brake fade.
PowerStop Z23

An option other then OEM rotors and pads is the PowerStop Z23 system. It includes slotted and drilled rotors (which look neat behind the wheels), and performance pads. It is a great looking upgrade, however you will not see any brake distance or fade improvements though.
Big Brake Kit
BBK is going to be the ultimate brake upgrade option. It will practically eliminate brake fade, improve braking distance, and improve brake pedal feel, not to mention look awesome behind the wheels.
Shelby GT350 Front Brake Kit + Adapter Brackets

One of the best just-front BBK is the GT350 front brake upgrade. To work, this uses the stock GT350 6-piston calipers, 15.5-IN. rotors, and adapter brackets from Tony Hernandez on Facebook. It is a great kit for a great price, and costs just less than $1,700 if you use the GT350R brakes (which are red) and less than $1,500 if you use the regular GT350 brakes (which are black). If you are still using stock wheels, then you need to use 3/4” spacers, which isn’t all bad. If you bump that up to 1” spacers, it will give the stock 21″ wheels a perfect stance, flush with the fenders. Sadly, you can’t use the rear GT350 brakes since they aren’t compatible with our electronic parking brake in the rear.
GT500 Front Brakes + Adapter Brackets

Just like the GT350 Brake swap, the 2020-23 GT500 brakes will swap over very easily. Using the massive stock GT500 6-piston calipers, 16.5-In. rotors, and adapters from Tony Hernandez, this is an awesome upgrade, my personal favorite.
Trackhawk Front Calipers + Racing Brake Rotors and Mounting Hardware

Another just-front BBK choice is using Trackhawk Front Calipers and Racing Brakes Rotors and Hardware. This is comparative to the GT350 swap, but is probably $1k more. The rotors and hardware from RB alone WITHOUT the calipers is the price of the whole GT350 brake swap. It would be a good option if it wasn’t for the extra price, but the GT350 or GT500 brakes are a better option.
SuperForged

SuperForged is the best choice if you want to go all out with a front and rear BBK. SuperForged’s brake kit includes 405-MM front rotors clamped by 6-piston calipers, 380-MM rear rotors clamped by 4-piston brakes, stainless steel brake lines, all the mounting hardware, and an 1-piston caliper for the parking brake (although there is a $100 option to integrate the parking brake into the caliper, which I assume saves unsprung weight). This kit retails for a fair value of $3,800 at time of writing.
Rotora
This is the ultimate bragging rights kit. Rotora has many options for BBK, but they all come at a price. All feature 8-piston front calipers and 4-piston calipers in the rear. The kit is just too expensive. The price for a front kit alone is the price of a front and rear Superforged kit. The performance benefit is not better either. In this case, bigger and more expensive is not better.
Drivetrain
Oil Tip

These cars have an oil pressure problem under hard launches. An easy fix is to fill the oil to 6.5 qts., which is actually what Ford now specifies on the 2025 ST.
Oil Pan

FenFabrication is offering an upgraded, bigger oil pan for these vehicles. It practically eliminates the oil pressure drop on launches, and also replaces the plastic oil pan which is nice also.
Built Transmission
The 10r60 is probably the weakest part in the driveline. The stock transmission can last quite a while under a lot of abuse, but if you are launching the car often or especially if you have a trans-brake, then you will need a built transmission. Getting a built transmission will give you the peace of mind of knowing that the tranny can handle anything you throw at it. RSA Transmissions is my recommended spot to get a built transmission done. They build a really stout transmission, and also currently use theirs in their record-holding 10-second ST.
Upgraded Flex Plate

An upgraded flex plate is a most if you have already built your transmission. It replaces the weaker factory unit, rounding out a fully built tranny.
JXB Upgraded Driveshaft Carrier

The stock driveshaft carrier bushings prioritize comfort over performance. It reduces NVH but also allows the bearing to sag creates slop in the driveline during WOT. The JXB Driveshaft Carrier features harder bushings ensure the bearing cannot move from center, allowing for better launches.
Upgraded Rear Pinion Bushings

Steeda offers an upgraded rear pinion bushing. I can not say how much I do not recommend these. So many people have experienced a lot of extra NVH, with no extra performance benefits. Also, they are a pain to install. Plus, a couple of people have had these parts fail.
HSF Billet Rear Differential Inserts
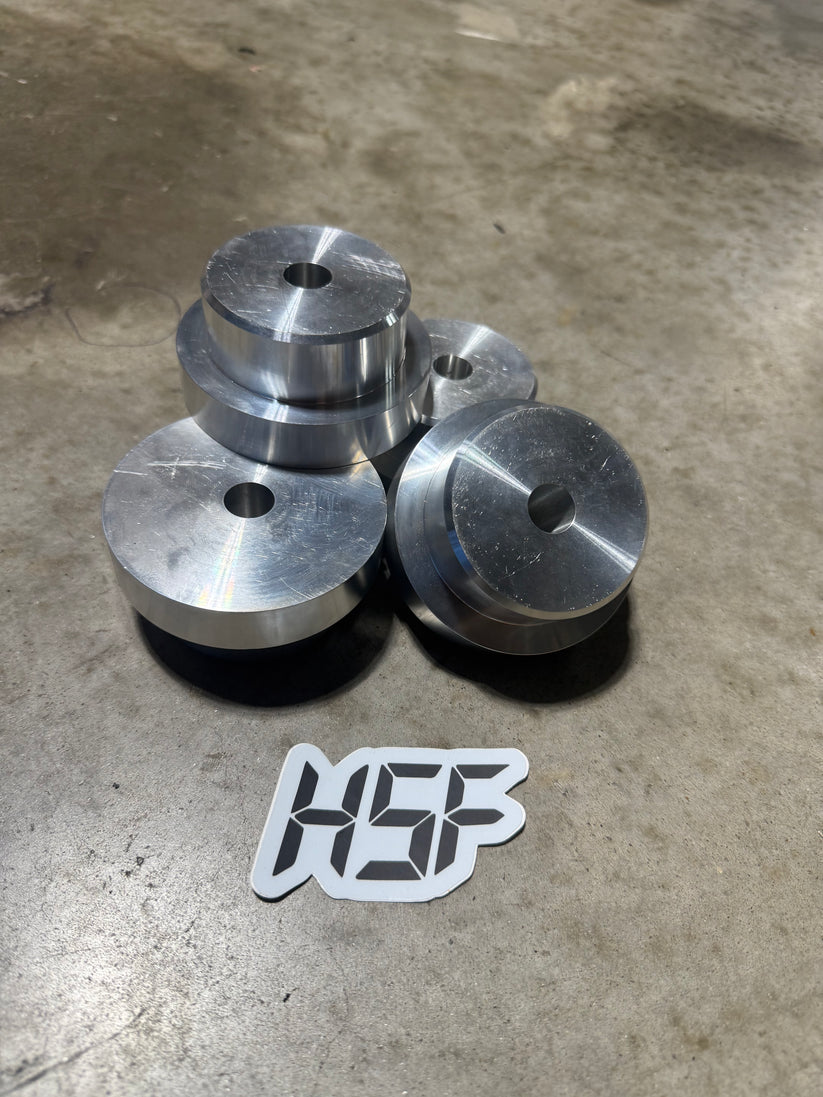
Houston Speed Freaks offer billet rear differential mount inserts. They are a fairly new product, with only a few people having reported to install them. They seem like an amazing prod
Transmission Mount Insert

FenFabrication offers an transmission mount insert that fills the voids of the stock insert. Multiple people have had the transmission mount slowly cave in on itself due to a lot of hard launches. This prevents that, with only a slight NVH gain.
JXB Transmission Mount Insert

A amazing product that will be stronger then the stock transmission mount. The stock transmission mount bushings have been known to collapse on itself after launching the car often. This has been a popular product because many people have found it adds ZERO NVH, which is crazy!
Differential Brace
1-bolt Rear Subframe

In late 2021, due to supply shortages, Ford decided to put the 1-bolt subframe from the 4-cylinder Explorers into the ST. Bad choice, horrible choice in fact. The 100+ extra HP that even the stock form produces is too much for the subframe to handle. Even on mild launches, the bolt is known to snap, which can lead to a domino effect taking out the rear diff, shoving the rear driveshaft up the transmission and boom, you could have a cracked engine block. Not fun even with a warranty. So, if you have the 1-bolt, get a differential brace.
The good news is that with a differential brace, you will not have that problem. The best ones, though the most expensive types, are the ID-Speed brace, Livernois Motorsports brace, or DX Brace, but there are worth every penny. The AWR does an okay job too, if you’re on a budget, it will still help, but it isn’t as good as the options mentioned already. The AWR also has a bad twisting effect. Steeda’s offering is okay, but they have had lots of problems of the bolts snapping holding it to the subframe.

The 2-bolt alone pretty much handles anything you throw at it, but you can still add the same differential brace. It is a peace-of-mind part. I would personally purchase it if you are launching a lot on a tune. Especially with a trans-brake. It just never hurts to be too careful. Tyler Clark had his rear bushings fail after a lot of launches, so it is probably best to get a rear diff brace if you are launching a lot.
JXB Rear Subframe Insert
The JXB rear subframe is another part that attempts to limit the violent stock rear subframe movement. The part alone won’t fix the bolt-snapping problem on the 1-bolt rear subframes, but it definitely helps, and pairs well with a rear diff brace.
Rear Differential Bolt Upgrade

One of the repercussions of the violent subframe movement is the rear diff bolt snapping under the pressure. The upgraded bolts from Steeda, HSF, and Whoosh are all the same, but definitely add some strength over the weaker bolts.
Oil Catch Can
A catch can removes oil droplets from air circulating from crankcase to intake. It is very important, and every 5k miles usually nets two shot glasses worth of oil that would have coated the valves, had the catch not stopped it. The best catch can that does the job perfectly is the UPR Catch Can, but it is 4 times the price of the runner up, the JLT 3.0. The JLT will do 90%+ of the job that the UPR will do, but at a quarter of the price.
F-150 EcoBoost Engine Cover

The engine bay of our ST’s are pretty messy. So many lines and the big HPFP right on top of the engine bay, isn’t something I’m a fan of. A couple of people have put on an F-150 Raptor or similar EcoBoost engine cover. This requires a little trimming to the cover, which is nothing hard, and it definitely cleans up the engine bay.
Fenfab Coolant Reservoir

If you want to showcase the engine bay, the Fenfab Coolant Reservoir could be a nice upgrade. It looks really neat, and as always with all FenFab products, the quality is impeccable.
Oil Crankcase Breather

An crankcase breather attempts to remove pressure from the crankcase (obviously the name), but is quite useless. Doesn’t make a difference at all and will spit oil everywhere, which makes me hate it even more.
Under Tray (aka Skid Plate)
Kind of an odd part for a street-oriented performance vehicle, is an under tray. This protects the engine from being damaged by any objects from below. If you drive trails/dirt roads or just want the extra protection, skids plate might be a good peace-of-mind part.
Ford Performance

Ford Performance (panned from the Timberline) offers a skid plate, which offers an easy access hole for the oil plug.
Houston Speed Freaks

Houston Speed Freaks (which is designed better then the Ford Performance unit) also features an easy access hole for the oil plug, as well as an air scoop to try to cool the undervehicle components.
Colder Thermostat

An interesting part is an colder thermostat housing that will trigger at a cooler temperature (160 degrees vs stock 180 degrees) attempting to keep the engine cooler therefore preventing heat soak. I haven’t seen any numbers, but I don’t think it does much, but it is all speculation.
Upgraded Fuel System

Nostrum fuel systems and Extreme DI are options if you need more fuel to be dispensed than the stock system can provide. If you are running an ethanol mix anything larger then e50 or you are FBO, you will need larger system.
Upgraded Turbos

If you want to go all out, upgraded turbos are the first thing that comes to mind. There are not many options that are bolt on, and all those options are just a ported and revised stock turbo. Plus, the stock turbos are already efficient as it is. You would probably only gain 40 HP on pump gas with the upgraded turbos. If you are running some ethanol mix though, that is where you will see large gains. So that makes it a bad choice for daily driven cars on pump gas, due to the price. If you are a drag-strip hooligan, or run ethanol, upgraded turbos will squeeze every last HP from the car. The thing is though, with that extra power and harder launches on the drag strip, you will need a built transmission, most of the suspension mods described in the suspension section, upgraded fuel system. If you want to take advantage of the extra boost, you’ll also need all the other performance intake mods. There are only two upgraded direct-fit turbos for the ST, CRP and Pure. CRP is superior due to faster spool. This path is not for the light of heart, but if you are running ethanol, you could be running low 11’s all day long, and maybe high 10’s.
Upgraded Wastegate

Still a very new product to the market, is the Turbosmart and CRP wastegates. This is supposed to allow for a faster spool and more precise boost control. It is unsure if the stock turbos will be happy with this. I will update this section once more people have installed this.
ECM Tuning
Not available on 2025+ ST's due to PCM being locked
This is the most important effective modification. Just an ECM tuning can bring the quarter mile times down to Low 12’s. There are quite a few options when it comes to tuning so I will just recommend the best for each purpose.
To go back to warranty, some people say they can hide a tune by resetting it to stock. This is not true. When you reset the car back to stock , the key cycles are resetted. A dealer will see if you have or had a tune on the car by seeing the key cycles. Some people have dealers that don’t care, others have gotten lucky because dealers don’t look at it. If you’re just going in for simple oil change, they won’t care, but any major repair they put everything under a microscope. Not saying it’s something I’d do, but unplugging the battery and letting the car sit for around 20 minutes also resets the key cycles. Not saying you should use that as an excuse, but something to note 🙂
Ford Performance tune: Honorable Mention

The Ford Performance tune needs to be mentioned because of it’s OE roots. Let’s start with warranty, where it seems like it becomes cloudy. It retains only the 3 year/36k mile warranty (which starts from the in-service date). After the 3/36 warranty, it’s considered an aftermarket part, and could void warranty if it is found to be caused the problem. It’s advertised HP is 430 HP and 467 LB.FT.TQ.. It is a bit expensive at $825, which doesn’t help it’s case. Throttle response and shifts points become noticeably better compared to stock, bit will never be as good as a custom tune. I honestly don’t think it is a good option, if you’re concerned about warranty, just wait until warranty is up and spend the same amount of money on a proper custom tune.
ZFG Tune: My recommended tuner
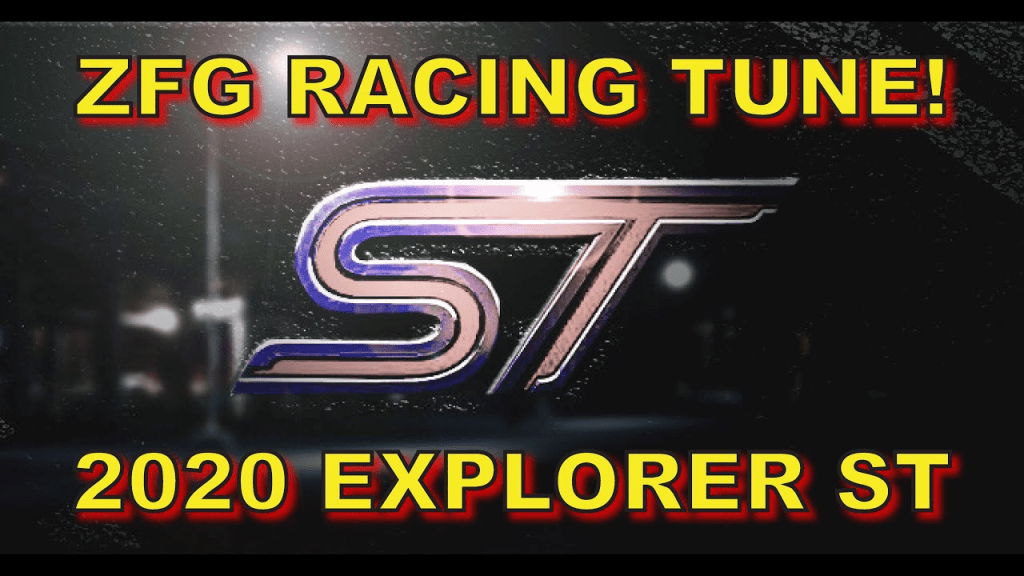
The ZFG tune is a great tune as recommended by many of those that have purchased it and the numbers that the tune achieves. Adam at ZFG knows how to tune these 10r60s and 3.0L perfectly. He owns all the records for these vehicles. That doesn’t mean his tunes aren’t safe though. These cars are just so awesome they can be safely, and easily put in the 11-second quarter mile, and driven to drop the kids off at soccer practice reliably. Another fun feature that ZFG offers is DMS (Drive mode specific) tuning. This is when each drive mode features a specific custom tune.
TunePlus: Best tune if you already have an Cobb AccessPort

If you already have an Cobb AccessPort, a great option is TunePlus. Although newer to the game, Adam Brunson at TunePlus is a great tuner, his custom single turbo car was crazy! He is a very experienced tuner and does great work with these cars.
Gearhead Tuning: Best tuner if you already have an SCT Tuner

If you have an SCT tuner already, Gearhead Tuning is solid option.
There are a couple other tuners that do good work, but these three tuners are going to be your top choices.
Exhaust
This part is highly subjective, as the “perfect” exhaust note depends on one’s taste. I will summarize this section.
Cat-Back Exhaust

The stock catback, though extremely quiet, is actually not that restrictive. Upgrading to an aftermarket exhaust will not net a worthwhile gain if you are just looking at it for power, but sound and replacing the rattle-prone flex-pipes (which will rattle in the future no matter what) are the pluses.
Stock Cat back with Aftermarket Tips

If you like the quiet exhaust but want something better looking than the tiny 2” quad-tips that come stock, it is quite simple to make it look better. 3” quad-tips with a 2” inlet slips right on with no fabrication. It is as simple as cutting off the stock tips, and welding in or screwing in the new exhaust tips. I do not recommend screw-in type tips, as they have a good probability of falling off. 4” exhaust tips will fit with some fabrication, but you will need a 2.5” inlet so that you can properly space the tips. They will fit in the diffuser perfectly but are not as easy as just slipping them on.
Muffler Delete Axle-Back

A very cheap option is to do a muffler delete. It sounds decent, but it will drone like crazy on the highway.
Resonator Delete
A resonator delete usually does wonders, as shown in the Mustang GT for example. Unfortunately the res delete on these Explorer’s will give it a very tinny sound as well as some drone.
Thermal R&D 2.5” Exhaust
This is the best exhaust for people who want some more sound when they step on it, but quite on everything else, the Thermal 2.5” Exhaust is the best choice for them. It is very close to stock while driving normally, and mildly loud when you get on it.
Thermal R&D 3” Exhaust
One of the top all-around exhaust is the Thermal 3” exhaust. Zero drone, mild sound when normal driving, and awesome sounding on acceleration. This is a great exhaust for people who want to hear EcoBoost sing the best song it can sing.
AWE Exhaust
Another exhaust that is great, is the AWE Exhaust. Same pros as the Thermal, zero drone, mild sound when normal driving, and awesome sounding on acceleration. The exhaust tips are awesome too, 4″ exhaust tips fill in the rear valance awesomely. It does have a deeper exhaust note I noticed over the Thermal. This is my favorite exhaust.
Downpipes
Downpipes are a great upgrade and help reduce restriction from the turbos. They also replace the crack-prone downpipes from the factory. Downpipes have been tested to show gains of up to 15 AWHP and take a couple tenths of a second off the quarter mile. Fen Fabrication, CVF, Whoosh and SPD are all great and perform the same, only differences are just price.
Exterior

Who knew that the Explorer could transform from a blocky SUV to a sports car beating sleeper? Why not display that power in the exterior?
Hitch Cover

The hitch-cover will give the rear of the ST a cleaner look in the rear. There are a few options to choose from, from the likes of Waido, Zeus3d, and a couple of others. The following link should be helpful when deciding:
https://www.lethalperformance.com/s…024-explorer-st/body-and-styling/hitch-covers

My favorite look, also because it is cheap, is a hitch cover cap. It looks really neat and costs around $25 at time of writing.
Front License Plate Delete

If you want to clean up the front end of the car, a front license plate delete is probably one of the best ways to do so. Bumperplugs.com is the best way to go. Their color matching the paint is amazing and is worth the extra price. To plug the whole in the plastic part of the bumper, you can go to your local auto parts store and buy some fender fasteners, and they will work perfectly.
Emblems

One of the things that is frustrating, is that the ST did not receive the black emblems from the Timberline. I love how a pair of custom emblems look. Emblem City makes a great pair of emblems if you are looking to go custom, and Ford Accessories have the Black emblems from the Timberline. The difficult part is you have to remove the front bumper to remove the emblem, unless you use a different, more nerve-wracking method. You can drill the tabs out through the stock emblems and the emblems will fall out from there. You will have to drill in the grille anyway, even if you remove the bumper, as you will need to drill some new holes for the emblem, even with Ford’s ones. It is quite easy though, when you use the included templates.
ST Emblem

A cool idea that @UNBROKEN came up with, is he removed the stock “ST” emblem on the grille and used an ST overlay to make it like a “ghost” emblem. It gets rid of the chrome too.
Rear diffuser

Waido offers a rear diffuser that slots beneath the rear bumper. I think it finishes off the look of the rear, as it will most cars will see as you speed away.
Hoods
There are only two options to choose from if you are looking to bring out a more aggressive look from the hood.
Stock Hood

There is an interesting thing you can do with the stock hood. The Explorer ST Forum member @UNBROKEN used Jeep Wrangler hood vents and cut into the stock hood. It looks pretty good but is not for the light of heart.
https://www.explorerst.org/threads/unbrokens-iconic-silver-st-build.503/page-51#post-74923 (Post 1,004)
I-5 Autohaus

I-5 Autohaus offering is a Raptor-style hood which is functional.
Front Splitter
A front splitter is something that will give the SUV a sports-car-like front end look. There are two options to choose from: Waido and SS-Tuning.
Waido
Waido’s front splitter is very classic looking, bringing the front end lower, giving the car a low, aggressive look. Waido offers two different styles of their splitter.
SS-Tuning

A very aggressive option is the SS-Tuning Front Splitter.
Side Splitter
Side-splitters help give the car a low look when viewed from the side. I think it complements the lines of the car very well.
Waido

Waido is the only true side-splitter offering. They look great and would pair perfectly with their front splitter.
Aftermarket Step-Boards

Step-bars on a low car like these cars don’t make sense, but they would be more for cosmetic purposes than functionality. They actually look really good, and maybe even better than Waido’s actual side-splitters IMO.
Waido Mid-Spoiler

The looks of Waido’s mid-spoiler are in the eye of the beholder, and there are a couple of different variants of the spoiler. The fit is good, but don’t expect to get any extra downforce.

SS-Tuning Drag-style Rear Wing
SS-Tuning offers an wing that overlays on top of the stock liftgate piece. It is an aggressive piece that looks good.
Widebody Kit

A wide-body kit sounds awesome for these cars, and that’s because it is! Pictured above is Travis Ellisor’s ExST with the Waido widebody kit. It is a killer setup, and that setup is 18×11 0-offset with massive 325 Hoosiers! The fit looks great, and is perfectly flush. Travis says that the setup only has some minor rubbing on the fender liner at full lock.
Painted Exterior Trim

Some people are not fans of the plastic trim that the 6g Explorer’s feature. Unfortunately, to paint it, it is not cheap nor easy to do. You cannot just wrap the plastic, as the vinyl will not adhere properly. To paint the plastic, there is a lot of prep work. Once done though, many will say it is worth it.
Rear Windshield Wiper Delete

Houston Speed Freaks brought the ultimate windshield wiper delete to the market. This windshield wiper delete is so flush and transparent, it looks like it isn’t even there. Some people are worried about the rear visibility loss due to no wiper in the rear, but if you clean the rear window thoroughly with a good waxing cleaning spray, the rain will just run down.
Roof Rail Delete

There are barely any parts involved in a roof rail delete swap, just two roof rail delete trim pieces. The hard part is you have to remove the headliner to get to the rail bolts. It isn’t hard, just time-consuming.
Headlight’s Chrome Black-out

DIY
Ford took the time to black out the taillights and the headlight marker lights but didn’t black out the chrome inside the headlight. The Interceptor’s receive the blacked-out headlights, but we don’t. There are a couple ways to hide the chrome. One way is to use headlight tint to cover the chrome, or you could open the headlights up (by baking them) and paint the chrome.
Professional
If you don’t want to tint the headlights, you can heat up the headlights in an oven, and open them up and painting them. You can then also add other cool options, like a color customizable DRL’s, Explorer lighting inside the headlights, and others.
LED Light Strip
A cool modification is the addition of an LED light strip. It connects the bright DRL’s with a bright strip, which is neat.
Ford Accessories Lighted Emblem

Ford Accessories offers a lighted emblem. Ford states it does not fit the 2020-24 Explorer’s, which is odd because that is what is pictured.
Lit Logo’s ST-Emblem

Lit Logos makes a lit “ST” emblem.
Front Strut Bar
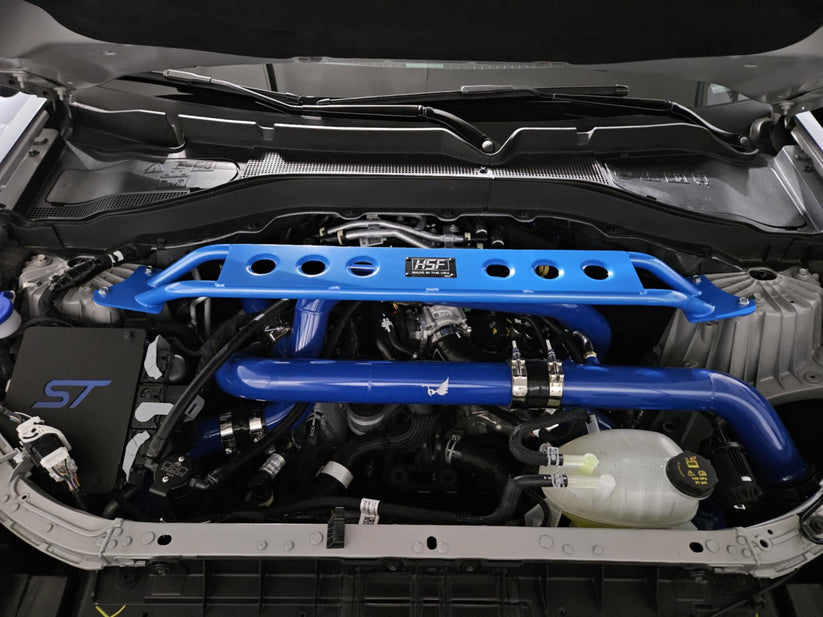
A great way to add cosmetic appeal to the engine bay is an aftermarket strut bar. Houston Speed Freaks, aFe, DX, and Steeda offer aftermarket strut bars for the ExST. Note though, none will add performance. All the bracing is towards the bottom, so the strut brace does not help.
Windshielf Wiper Fluid Cap
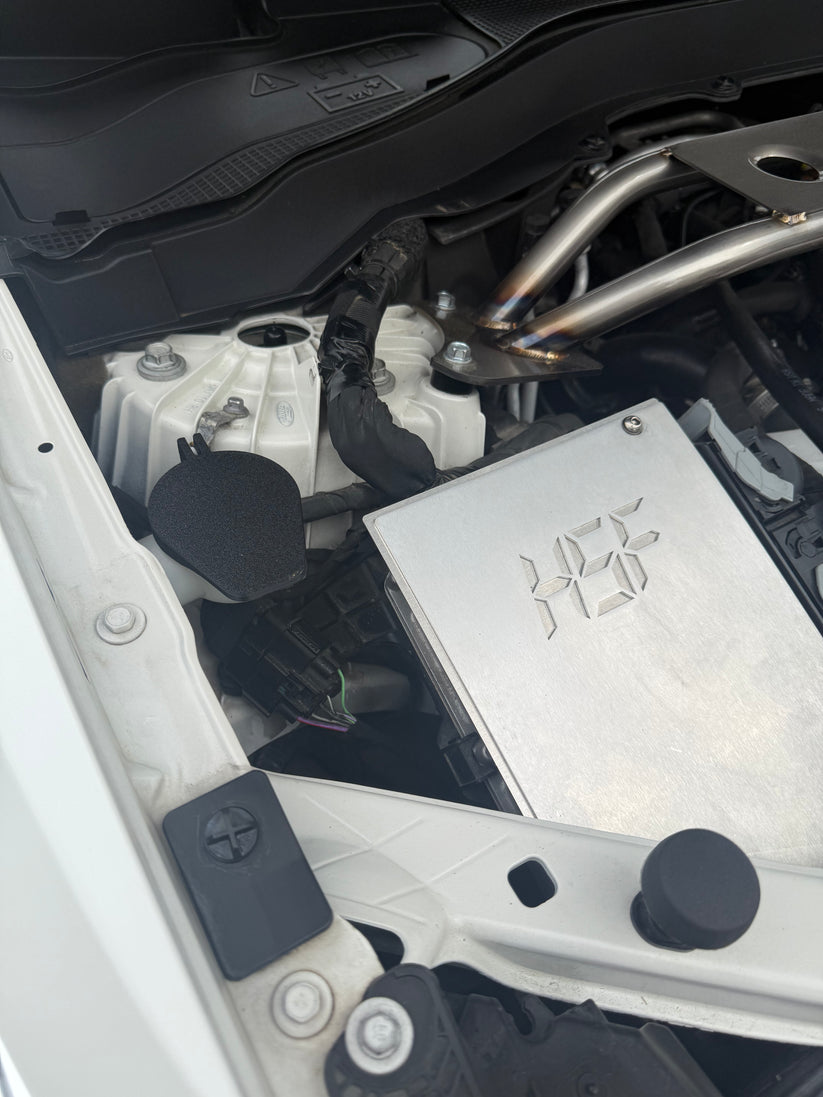
Houston Speed Freaks offers a 3d-printed windshield wiper fluid cap. It looks neat.
Functionality
Hood Strut Kit
If you are opening the hood often, it might be a worthwhile purchase for a hood strut kit. The best one, since it does not require drilling, is the no-drill MRT Hood Strut kit.
Reverse Light
The reverse lights that come stock are horrific. You are better off riding the brake so you can at least see. I highly recommend Houston Speeds Freaks reverse lights. They are brighter than most headlights and are of great quality.
Turn Signal Lights
This is a pure cosmetic mod, but one that I like. The stock halogen lights look cheap, and the LED turn signals look crisp and premium looking. Again, I highly recommend HSF’s LED turn signal lights.
Intercooler


The #1 modification everyone needs on their Explorer ST is an upgraded intercooler. Any quality intercooler (CV Fabrication, Whipple, Steeda, CPE) are all the same performance wise, and are more then 2-times the size of the stock intercooler (which is the same size as the Focus ST intercooler). I cannot stress enough how importent this mod is, even on stock tune.
*Use of an aftermarket intercooler on 2025+ ST’s requires charge pipes (which are universal across ST’s 20-present)*
Intake
The stock intake is not too restrictive, but if you are pushing the platform to it’s limits, an intake will be helpful. If you are just tune and intercooler though, an intake will not help performance wise. Sound wise, no intake except the FenFab will help. And boy, the Fenfab V1 or V2 intake will give so many fun whooosh sounds.
Charge Pipes

The factory charge pipes are restrictive in the fact that they change diameter and shape throughout the part. As you can see in this photo, FenFab’s charge pipe is significantly better for airflow. If you want to do charge pipes it should be done with an intercooler since bumper removal is required for it, and having the bumper off will give you more working space to install the pipes.
Drop-In Air Filter

The drop-in filter is a good upgrade for the stock intake. Not sure of any gains but the re-usability that some of the aftermarket offerings feature are appealing.
Intake Snorkel

The Velosa Tech Intake Snorkel and S&B unit look neat behind the grille, but they are just gimicks. No gains.
Optimuz Intake Air Scoop

Guaranteed to be completely useless, is the Optimuz Intake Air Scoop. On their website, they give you numbers that are too good to be true.
Suspension
Rear Sway Bar

The rear sway bar will completely transform the way that this 4,000 LB SUV handles. Steeda and aFe are the two manufacturers of aftermarket rear sway bars for the Explorer ST’s, and I would recommend aFe. As far as performance goes, Steeda is slightly better but Steeda’s sway bar rusts out really bad in just a year or two while the aFe does not.
Front Sway Bar

The front sway bar is extremely hard to install and there is no worthwhile difference.
Upgraded Shocks

Kelltrac offers their adjustable Viking shocks for the rear on these vehicles. They do not offer struts for the front. These are the only aftermarket shocks available for the 6th-gen Explorer. They retail for $699, which is pricey but these will definetly be worth it for those launching the car often.

A cheaper option if you just want some better performance, the Police Interceptor Utility (PIU) shocks are a great upgrade. Noticeably firmer, but not making the ride uncomfortable, they make a big difference rather cheaply too.
Lowering Springs
Lowering springs are probably my favorite cosmetic mod, but it also helps handling also. Steeda, H&R, Lethal Performance, and Eibach are offerings for lowering springs.
Steeda Lowering Springs

Steeda’s lowering springs retain the factory “rake” of the suspension (rear is higher than front). If you tow any type of medium-large trailer or if you just plain like the look of the “rake” this is your best option. Steeda’s setup will give you more control over a trailer then other offering.
H&R

H&R was the first company to provide lowering springs for the ExST community and they are the most popular offering. They are a great springs and nothing but positive reviews for them. The advertised drop is 1.6In. front/1.75In. rear.
Lethal Performance

Lethal Performance’s springs were plagued with problems, but now seem to have been fixed. The advertised drop is 1.8In. front/2.0In. rear.
Eibach

Eibach is another choice. They have the most drop when they settled. In my opinion, these would be the ones I would purchase.
Coil overs

Coilovers look amazing, as they drop the car a lot. I do not recommend them though. The reason is, is when you lower the vehicle past what all the lowering springs do, it is very difficult to get it aligned correctly. Graveyard and FV Coilovers are cheaply built, crappy system. BC Forged is new to the game, and they seem to be better quality. My biggest critique is that BC Forged themselves said that their coilovers are not meant for aggressive driving. Big turn off for me.
Rear Toe Links

Rear toe links prevent instability and wheel hop during hard launches. It is one of the top noticeable mods and paired with a subframe lockout, eliminates any wheel hop. Wheel hop on these cars can lead to the destruction of the axles and half-shafts. Steeda and Fen Fabrication both produce them, with no difference between them.
Subframe Lockout Kit (also known as Subframe Bushings)

Subframe lockout kit helps prevent the subframe from moving during hard cornering or launches, giving the car a solid feel, no wheel hop, and a connected feel when cornering.
*Steeda has forced FenFab to not produce their subframe lockouts*
Rear Vertical Links

The rear vertical links are extremely weak, being extremely easy to bend. Because of the noodle-like rear vertical links, it contributes to horrible wheel hop and bad handling. Thankfully, there’s two different ways to fix this, one by Steeda, the other one is the FenFab. The FenFab unit is solid, with no cavities, making it a lot stronger.

Steeda’s option is a solid block to insert into the stock links, filling in that space. It works, just probably not as well as the FenFab unit. Problem is, some people have found that the stock link was bent, making it impossible to insert the Steeda unit.
Alignment Tip
The front and rear track width is exactly the same on our vehicles, but due to a weird rear camber setting, the rear wheels look like they are sucked in more then the front wheels. Updating the rear camber to -.5 degrees will set the wheel where it should be.
Wheels

Who would have thought a 4,000LB. SUV could spin all 4-tires and run 11’s in the quarter mile all day long!? To put all that AWD grip to use, a good wheel setup is needed.

The best setup is 22×10.5 et.30 wrapped in 295/40r22, 305/40R22, 305/35R22, or even 315/35r22 rubber (the better available tire size). If you are going custom from the like of Vossen, Velgen, or others, this is the only way to go. Forged rims are what you always want to aim for, as they are lighter and stronger than their cast counterparts. The best-looking wheel is in the eye of the beholder so here are a couple threads that can help you choose:
https://www.explorerst.org/threads/aftermarket-wheel-thread.1052/
https://www.explorerst.org/threads/22-wheels.1467/
Interior

While these vehicles have the capability to be really fast vehicles, the main point of SUV’s are to be nice interior-wise. There aren’t too many mods interior-wise, but you can find some ones below.
Lincoln Aviator Screen Swap

Anybody that has dealt with the 10″ Sync3 screen knows that Ford designed it poorly. The best option if you are unhappy enough with the touchscreen to do something about it, is swap in the Lincoln Aviator touchscreen. It features a landscape-orientation, full-length Apple CarPlay, and full-length 360-degree camera. This rectifies the worst problems of the stock optional screen. It isn’t that hard to swap the screen, and you can find a thread about it here:
Did the Lincoln screen swap | Explorer ST Forum
Pedal Covers

An interesting cosmetic upgrade is pedal covers you can get from Amazon. They dress up the interior a little and are pretty cheap.
Lincoln Aviator 2nd Row Center Console Swap

2020 and 2021 Explorer’s featured a small center console in-between the captain chairs, and later 2022-24 Explorer’s deleted that. Explorer ST forum memer @UNBROKEN is probably the only one that has, and probably ever will, swap in an Lincoln Aviator 2nd Row Center Console swap. It is very expensive, and takes some time to source all the parts, but if that is what you are looking for, it is an neat option. His writeup about it is in his build thread found below:
UNBROKEN’s Iconic Silver ST build | Page 47 | Explorer ST Forum
Seat Painting

A neat little detail you can do is use a PaintMarker to color in the ST-symbol on the seat. It’s a nervewracking, very precise thing, but it’s a neat little detail.
Custom Steering Wheel

A custom steering wheel is an awesome interior touch. Cody Ball makes some really awesome steering wheels. It looks awesome and he offers a lot of different custom touches you can do.

Whoosh Motorsports makes an nice Alcantara steering wheel also.
Thanks for reading!
Thanks for reading! Hope this guide is useful to many of you. Make sure to subscribe to keep up with all our latest content!
All Rights Reserved. Explorer ST Enthusiasts 2025. All photos belong to their respective

One thought on “Explorer ST Modding Guide”